 |
 |
|
|
Display cabinet |
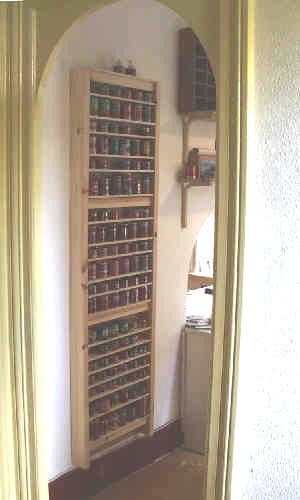 Picture 1: The storage system. |
The picture on the left shows the entrance to my humble kitchen. First thing you see when entering is a large storage & display cabinet for my collection. I designed and constructed that storage system specially for my tomato paste cans, but the same system could be used for many other collections as well (toy cars, trains, thimbles etcetera). Find out below how to make a similar rack with the following advantages:
|
||||||||||||||||||||||||||||||||||||||||||||||||||||||||||||||||||||||||||||||||||||||||||||||||||||
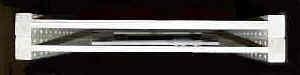 Picture 2: Top view (without shelves). 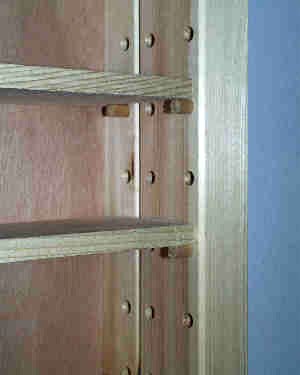 Picture 3: Detail of rack, showing the shelve supports. |
The rack is based on side-frames from Ikea's furniture system 'Ivar'. What would normally be the left or right side of a storage rack, becomes the front or back side of our display rack. Picture 2 shows a top view of the finished rack without the shelves. 2 side-frames which would normally have some 40 cm or 80 cm wide shelves inbetween them, are mounted straight against each other. A thin wooden panel (difficult to see in the picture) is mounted in one of the frames and makes the back side of our rack. The most difficult part of building a do-it-yourselve rack, is to get straight angles and to make the holes for shelve support at equel distance. It often ends up in a mess unless you have professional wood-working tools. Picture 3 shows why the 'Ivar' frames are so suitable for our rack. These solid and straight frames already have lots of mounting holes at equal distance and these holes are on the 'inside' of the frame. Ready to use. |
||||||||||||||||||||||||||||||||||||||||||||||||||||||||||||||||||||||||||||||||||||||||||||||||||||
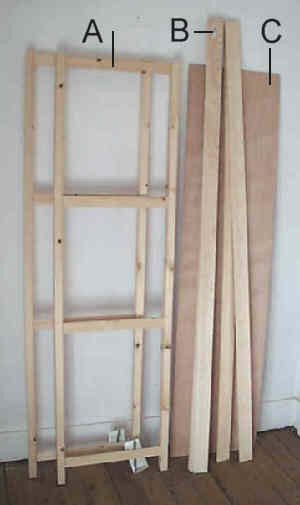 Picture 4: Required material. |
To build the above rack with 20 shelves, you need the following material:
The indicated prices are what I paid in France in year 2000. The wooden panel could probably be cheaper. I had the woodshop to make it to my specified dimensions. That saves a lot of work. If price is a real big issue, you could consider to make the rack without back cover. That also gives deeper shelves (see table below). |
||||||||||||||||||||||||||||||||||||||||||||||||||||||||||||||||||||||||||||||||||||||||||||||||||||
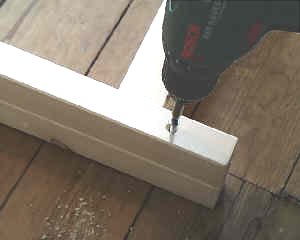 Picture 5: Mounting the frames together. |
The frames are mounted together with 8 screws. Because of the size of the screws you must first drill a hole. Make sure to drill the hole all the way through the back frame but only partly through the front frame. In that way no screws or holes will be visible from the front side. It's very important to carefully align the two frames. |
||||||||||||||||||||||||||||||||||||||||||||||||||||||||||||||||||||||||||||||||||||||||||||||||||||
 Picture 6: Cutting the shelves. |
For the 500 mm wide frame we need 435 mm wide shelves. Use an electrical or hand saw to cut the wooden strips in 435 mm long pieces. Make sure that the cutting edge is straight, otherwise the shelves may not fit. |
||||||||||||||||||||||||||||||||||||||||||||||||||||||||||||||||||||||||||||||||||||||||||||||||||||
Alternative dimensionsI have placed the back cover in the back frame. In that way I loose a bit of the total depth, but the remaining 70 mm is enough for my tomato paste cans. Alternatively the rack could be made without back cover, or with the back cover mounted against the back frame. This will allow you to put 88 mm thick objects in the rack. For collections of smaller objects such as Dinky Toys or thimbles for example, one frame will be enough. Note that an eventual back cover of a single-frame rack can only be mounted against the frame, not in the frame. The frames are available in 4 heights and 2 widths. So in combination with the above mentioned options, we can create 3 x 4 x 2 = 24 different racks. The table below lists all 24 combinations.
w x d = width x depth of shelves (mm) n = maximum number of shelves price = price indication for the 2 frames (not the whole rack) (Euro) |
|||||||||||||||||||||||||||||||||||||||||||||||||||||||||||||||||||||||||||||||||||||||||||||||||||||